
This section is a WordPress Network installation, designed to make it easier to set up webpages for African charities. I will create a generic template as a basic setup, with instructions how to easily customise it for yourselves.
To know how to make your own webpages is a good skill to have, as a profession but also tool with which you can create an online presence for the purpose of selling a product or service.
For my own simplicity I will document all my processes on this page, which you can use as a tutorial when customising your own pages. I will be setting this up for Retec.
Set up a Subsite
I will send you email instructions how you can log into your administrator account. It is possible I might also only assign you enough rights to only create webpages. As an administrator you can completely customise and make design changes to your site.
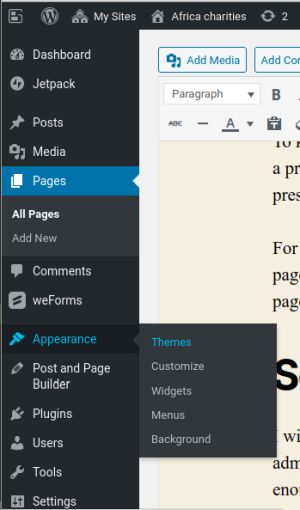 You will now see your admin panel on the left of your screen, like here. If you hold your mouse over Appearance (without clicking anything), a submenu will popout to the right like shown here, showing Themes, Customize etc. Click on the Themes to choose one you like. Note that you can change your Theme in the future, but that you may have to set up certain links and structures again, so it is better to decide now which Theme you prefer and stick with that.
Because this charity liked a theme I randomly picked for another African charity, I installed it in the network:
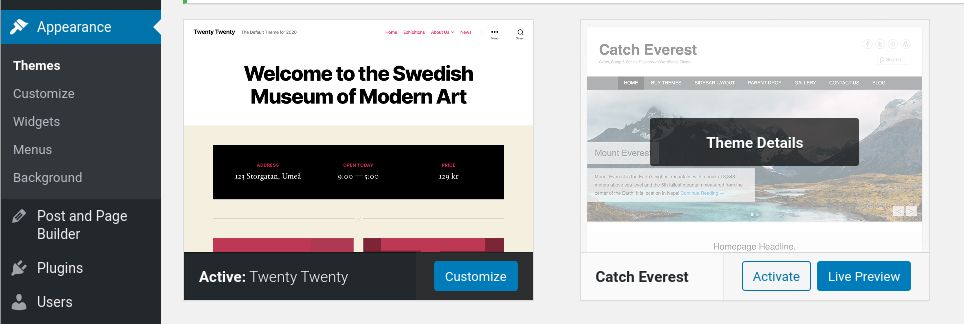
Catch Everest should therefore be available for anyone to use for their webpages, but there is nothing stopping you from surfing the vast inventory of free themes at WordPress, and I can install a new one that you like!
Press Activate to activate your chosen Theme.
Make your first page
You can make either Posts or Pages. Posts generally allow people to add comments, which is good for Google if it sees that the webpage changes occasionally and people are interacting with the page. Pages might not allow comments and are generally reserved for important pages. Because this will be the main entry page, lets make it a Page by going to the Pages menu and click on Add New.
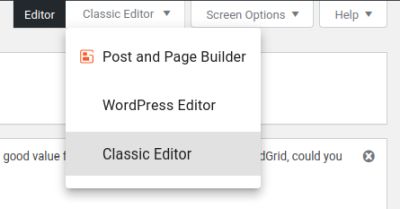 Now near the top right of your Edit/Create Page you will see an option on which Page Editor you would like to use when creating or editing webpages. I prefer to use the Classic Editor and this page will explain how to use that, although you can probably use a lot of the information even if you choose another Editor.
In this Editor mode, the top of the page looks like:
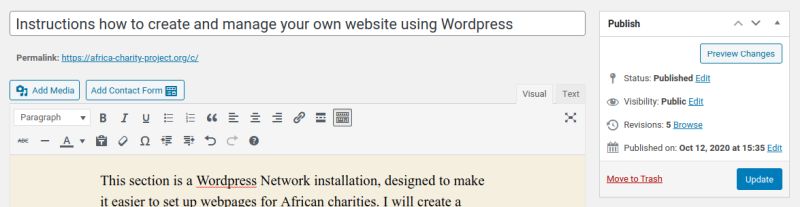
Like for posts, near the top you fill in the title of your page (in this case “Instructions how to create…”). Below that you will see a simple toolbar. You can find additional information on designing in WordPress on articles I have written in the past:
- Design your cover letter in WordPress
- How to Upload or Add Text to WordPress and Nicely Format your Pages
I easily created the above bullets by clicking on the Bulleted List button on the toolbar. Just hold your mouse over each button to see a description.
Using Headings
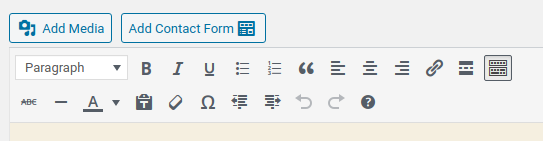
In the top left of the toolbar you will see Paragraph, which when you click on creates a list of options:

This is a great way how you can have different parts of your page in different formats, in this case 8: Paragraph, plus the six Headings, and the Preformatted format. Later I will show you a sneaky peaky way< how you can easily change the details of each format. You can change the font, size of the font, bold or italics etc, margins and paddings (how much the paragraph indents from any direction etc), and whatever other modifications are possible using basic html commands.
In this way you can quickly change the format of different paragraphs according to a style you can specify. Once you have figured out this neat way how to insert different formatted text, now lets talk about…
Inserting images
 Images are important because they are eye-pleasing, and they help motivate the reader to read your entire message. You can place them on the left or right or center, and resize them.
For this I like to use IrfanView, a free and fast image editing program with a lot of options and easy to use. It is Windows based but I got it to run in Linux too.
But there are many free programs out there. The important point is to be able to crop (select a certain square inside a picture), resize and save your images in different formats (primarily jpg) and compression ratios. This is because if a webpage has a lot of large images, meaning they download to fill the page slowly, a lot of viewers will not have the patience and move on to some other website. Hence you lose customers in this way. So placement of images throughout your text and keeping them as small (in kilobytes size) as possible while keeping the best quality possible (a compromise). If you can keep larger pictures to below 100kbytes size, you are doing well.
My webpage about IrfanView I mentioned above should also explain how to use Screenshots to crop and resize what you see on screen, using those also as images in your webpages.
Change format of headings/paragraphs
Now that you have populated some webpages with text and images, you may want to get creative with some paragraphs. Such as quotations from important people, such as:
It is not how we do it, but why.
For this I simply decided that I will use Heading5 for this type of format, then went to Appearance > Customize, which gives you:
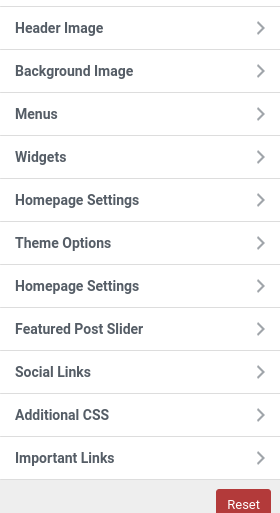 This gives you the Customize Toolbar, where you can make many changes to your theme. Feel free to peruse and experiment these, just be careful, otherwise I’ll state the most important points in this article.
To be able to make changes to the formatting of Headings, go to the bottom at Additional CSS.
This will give you the screen to the right.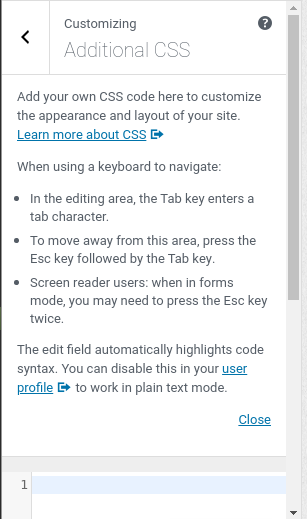
At the bottom you will see the number 1 there. You can click in that area with your mouse to move your mouse there (into the code box), and now you have become a regular CSS coder!!
There are tons of pages out there explaining all this, but in short, if you would want to change the format of Heading5, you would simply type/paste the following text into the code box:
H5 {font-size: 24px; margin-left: 15px; }
For this above text/code, I chose the Preformatted heading style and changed the font color in the toolbar.
In any case, “H5” stands for Heading5, which is then followed by
{ } , whereby everything between these two brackets will apply to H5, as long as you separate each characteric with a ; as shown in the example above. Your list of formatting commands can go on forever, as long as they are each separated with a ; (semi-colon).
To change the paragraph format, use p instead of H5 or H6 etc.
To find the commands on the internet, you can search for something like:
css style indent paragraph left
to take you to w3school‘s website. First result in Google and generally a good source to look to for things like this. But there are several good ones and generally an easy source to find.
You can also adjust individual paragraphs by clicking on Text in the top right of the Editor toolbar:
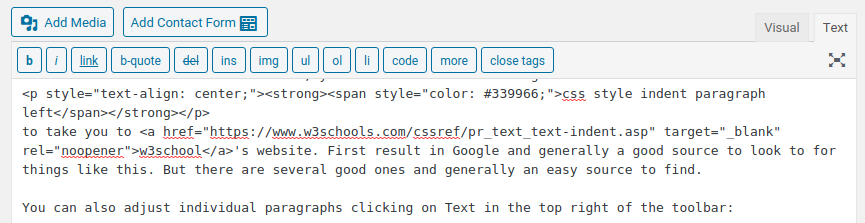
This will convert your entire Editor window from Visual to Text/Code mode. To be computer safe it would be better if you saved/updated your page first before switching to Text mode. You will now see the actual code behind the page, where you can apply CSS code on an individual basis, but I find I often have to struggle with this, or it does not work properly, which is why I prefer the Heading approach.
Oops, according to WordPress the word count for this page is 1,350, which is roughly a good size or maximum for a webpage, for SEO purposes. But before I start talking about Menus and links on the side and bottom, lets…
Make your first page the main page
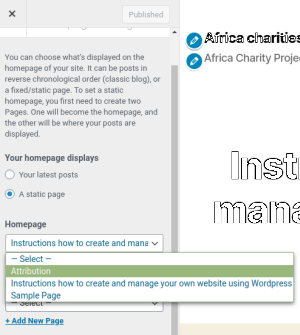 The default setting is to make your latest posts as highlights on your main page, but this is not so good for business type pages, where the main root page should be static. So, go to your tab (you should have several tabs open in your browser, to make and view changes) in design view Appearance > Customize > Homepage settings shows the image to the left. Change “Your homepage displays” from “Your latest posts” to “A static page, and choose this Page that you had just saved/updated. For our charities case it would be the root folder of https://africa-charity-project.org/c/retec/.